Even though AMP4Email was supposed to be The Next Big Thing™ in email, it is still supported only by a handful of email service providers and the tools for development are kind of lacking.
From positive side, Gmail is one the email service providers that support AMP4Email and Gmail alone makes up a huge portion of current email ecosystem. From negative side – you need to get verified by Gmail before your dynamic emails are accepted.
Anyhow, let’s forget about the hurdles of getting your mail actually rendered and let’s look at the tooling. And specifically, how to use Nodemailer to develop those dynamic emails.
It just happens that Nodemailer can get you quite far on that side as Nodemailer, the email sending library, has AMP4Email support built in. And it can also be used for testing, as NodemailerApp, the email debugging app, is capable of rendering not just regular HTML emails but AMP4Email emails as well.
NodemailerApp
To test AMP4Email emails you need to somehow display the messages. Download NodemailerApp for Windows or OSX from here or if you are using Linux, then you can get it from the Snapcraft Store.
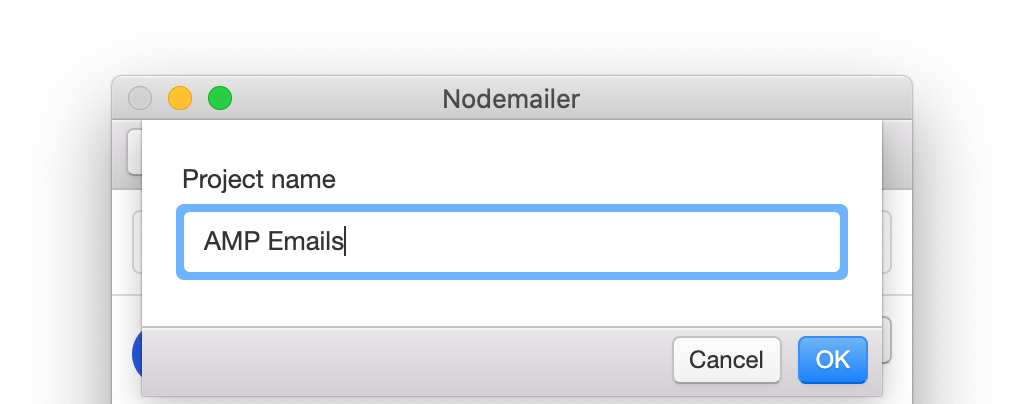
Once you have the app, start it and create a new email project.
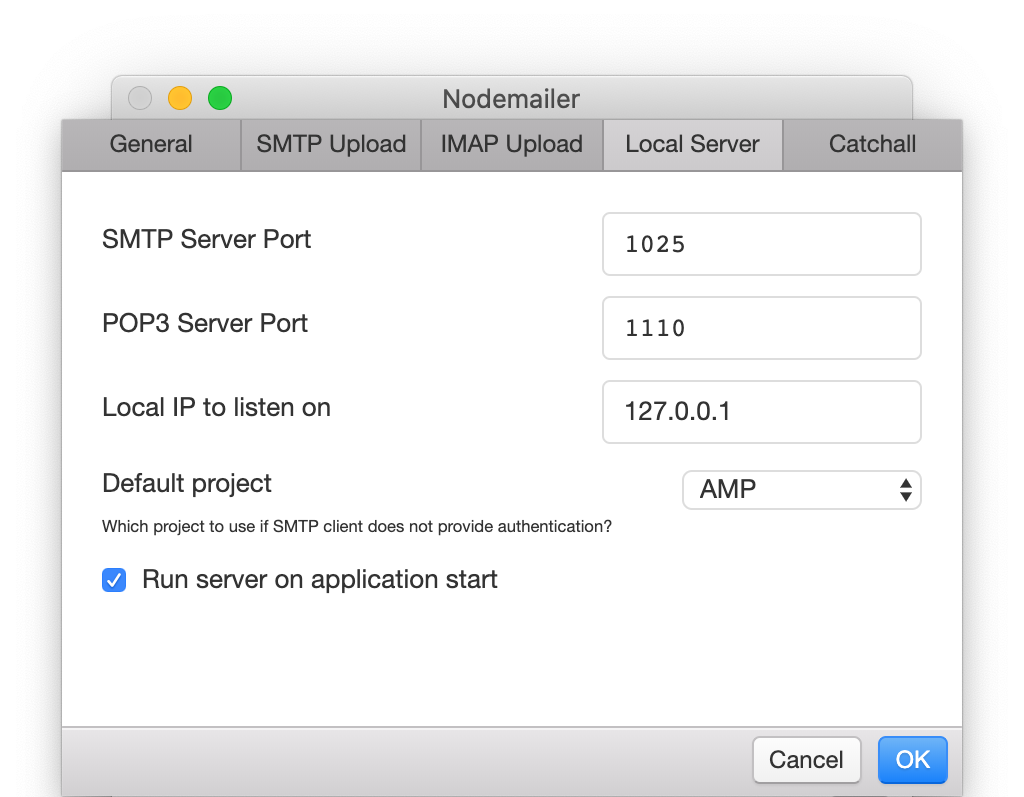
Next open local server preferences (“Server” -> “Configure”) and make sure that SMTP server configuration looks about right. In this example we use the default port 1025 for receiving emails through SMTP. For extra convenience enable checkbox “Run server on application start” and hit “OK”.
In the “Server” menu, click on “Start server” if server is not already started. This gives us a running SMTP server where to send out AMP4Email messages for preview.
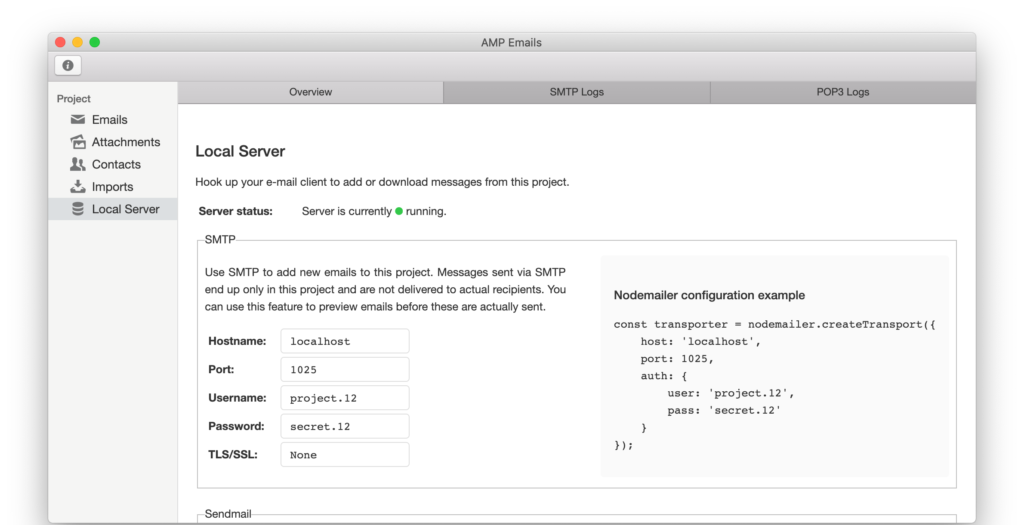
Next open “Local server” view in the email project to get the Nodemailer configuration settings. If everything is OK then you should see a green marker with “server is currently running” message.
Nodemailer
At this point we have everything set up on the receiving side. Now we have to send some AMP4Emails to test it out. We’ll use a simple Node.js script for it and Nodemailer specifically.
$ npm install nodemailer
Once we have nodemailer installed, let’s create a new script and copy the nodemailer configuration from NodemailerApp:
const nodemailer = require('nodemailer');
const transporter = nodemailer.createTransport({
     host: 'localhost',
     port: 1025,
     auth: {
         user: 'project.12',
         pass: 'secret.12'
     }
 });
Next we need to send an actual email using this configuration.
AMP4Email configuration looks pretty much the same as any regular email. You can specify AMP4Email content with the amp configuration key but remember that AMP4Email requires either plaintext or HTML content present as well. This is because it is highly probable that your dynamic content is not rendered, thus you need alternative content to fall back to if this happens.
let message = {
   from: 'Nodemailer <[email protected]>',
   to: 'Nodemailer <[email protected]>',
   subject: 'AMP4EMAIL message',
   text: 'For clients with plaintext support only',
   html: '<p>For clients that do not support AMP4EMAIL or amp content is not valid</p>',
   amp: `<!doctype html>
   <html ⚡4email>
     <head>
       <meta charset="utf-8">
       <style amp4email-boilerplate>body{visibility:hidden}</style>
       <script async src="https://cdn.ampproject.org/v0.js"></script>
       <script async custom-element="amp-anim" src="https://cdn.ampproject.org/v0/amp-anim-0.1.js"></script>
     </head>
     <body>
       <p>Image: <amp-img src="https://cldup.com/P0b1bUmEet.png" width="16" height="16"/></p>
       <p>GIF (requires "amp-anim" script in header):<br/>
         <amp-anim src="https://cldup.com/D72zpdwI-i.gif" width="500" height="350"/></p>
     </body>
   </html>`
 }
Now we have everything we need, we just have to use the previously defined transporter to send out the configured message object.
transporter.sendMail(message, (err, info) => {
  console.log(err || info);
});
Let’s see the result
Running this script should return us information about sent message
{
   accepted: [ '[email protected]' ],
   response: '250 Message imported as 1',
   envelope: { from: '[email protected]', to: [ '[email protected]' ] },
   messageId: '<[email protected]>'
}
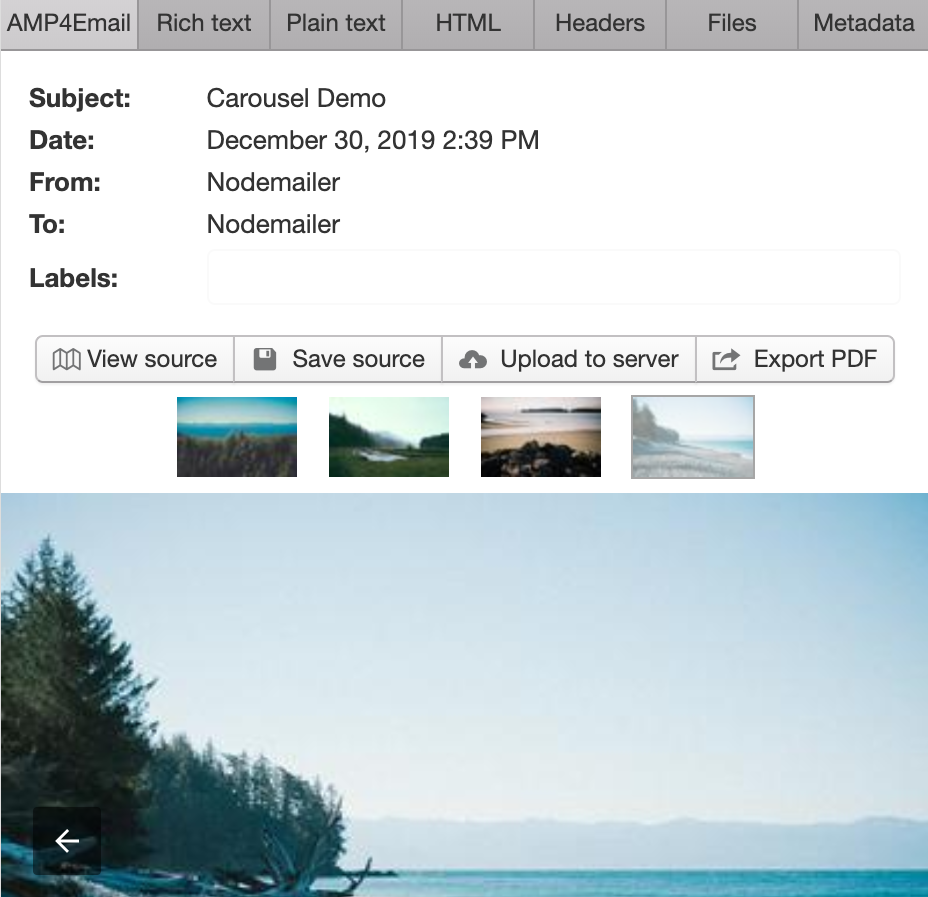
And the NodemailerApp should show us an animated cat image from the AMP4Email

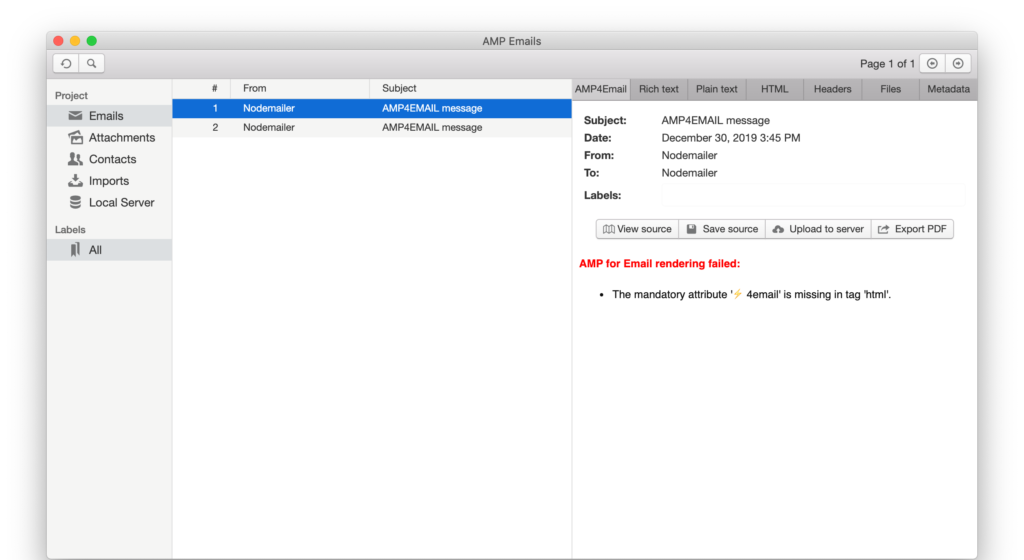
If something went wrong or the AMP4Email message was not valid, then we should see an error message instead.
If you have already got a working AMP4Email email working in NodemailerApp then you can try to send the same message to a real service as well.
Remember that there is not much point in sending invalid AMP4Emails to Gmail as Gmail never tells you what went wrong, you just see the fallback HTML or plaintext and that’s it. So if NodemailerApp is not able to show you your message then other services most probably would not render it as well.